Introducing Team Management
Our Team Management feature is designed to help you organize your teams more efficiently and collaborate with ease. With this tool, you can define custom roles, assign the right permissions, and add team members with specific responsibilities, creating a permission structure that fits your organization’s needs. This feature allows you to:- Clearly define roles and responsibilities to boost collaboration.
- Control access levels to protect sensitive information.
- Monitor and adjust your team structure as your business grows.
Create a New Role
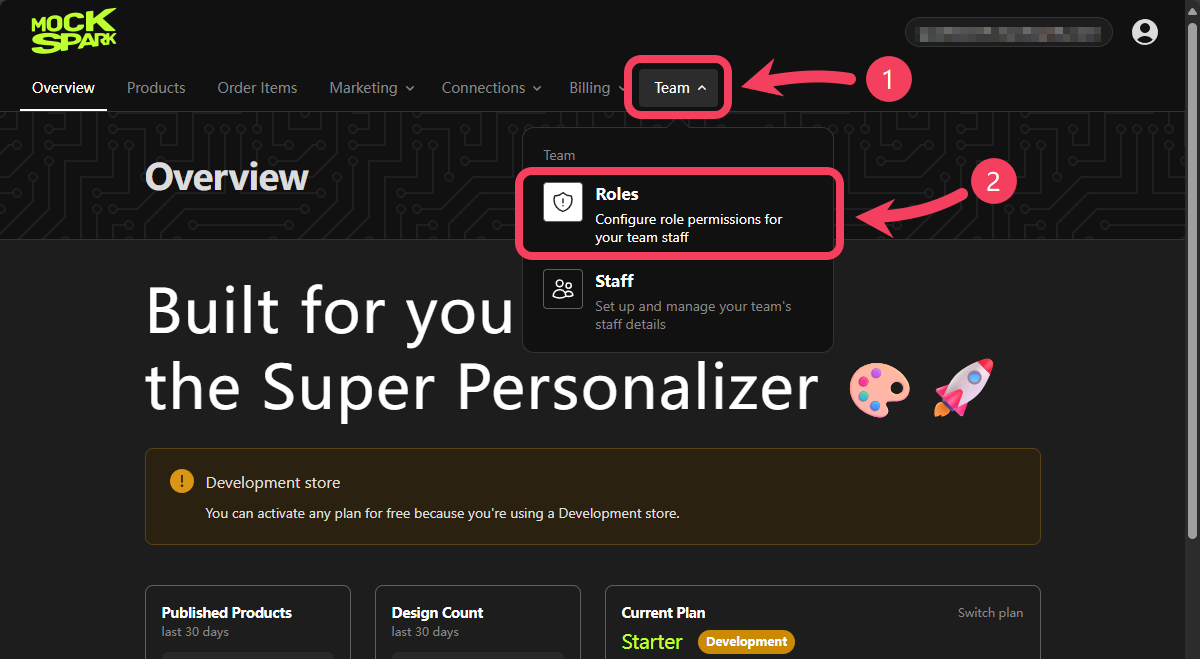
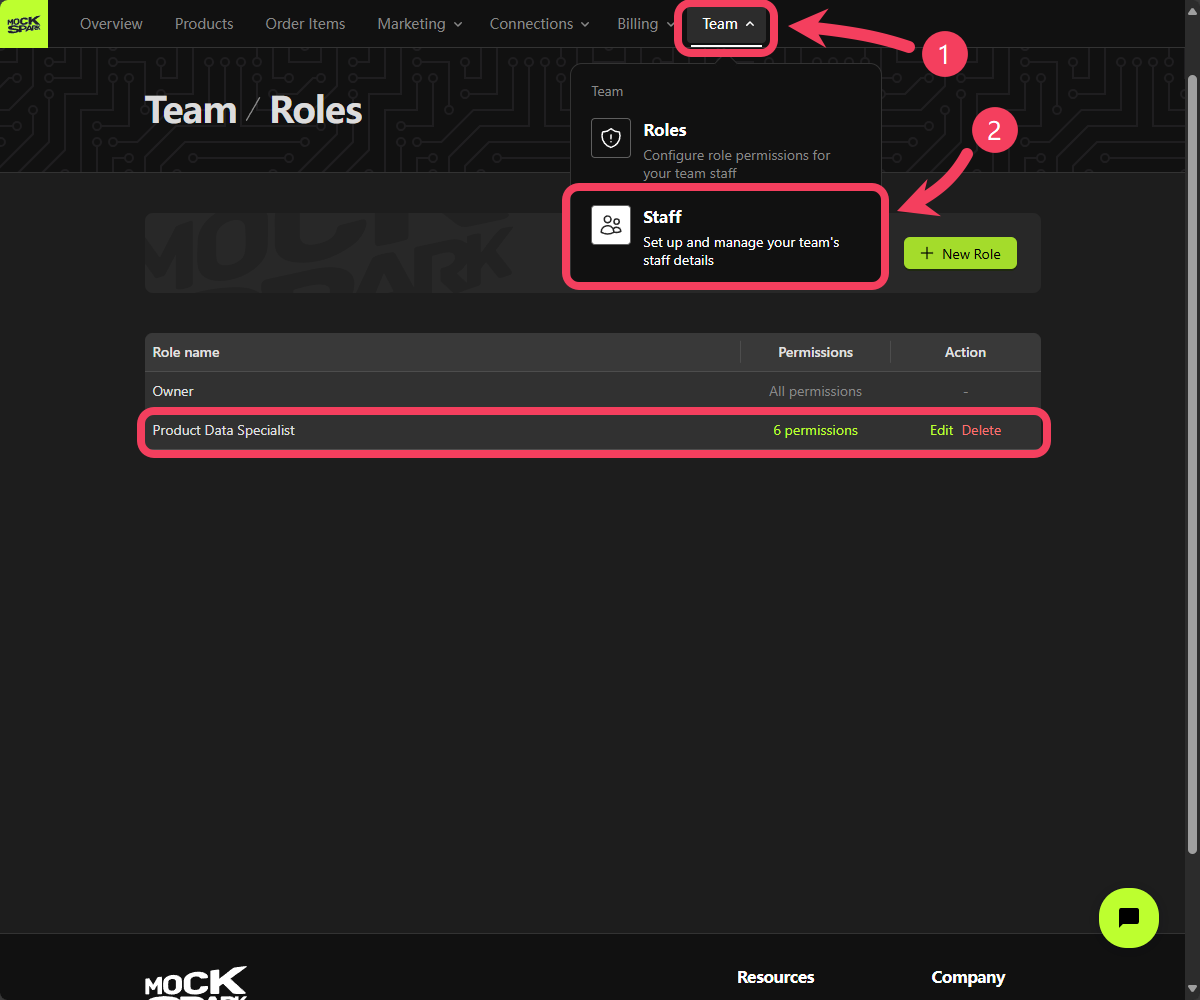
- Select Team section from the top navigation bar.
- In the dropdown menu, click on Roles.
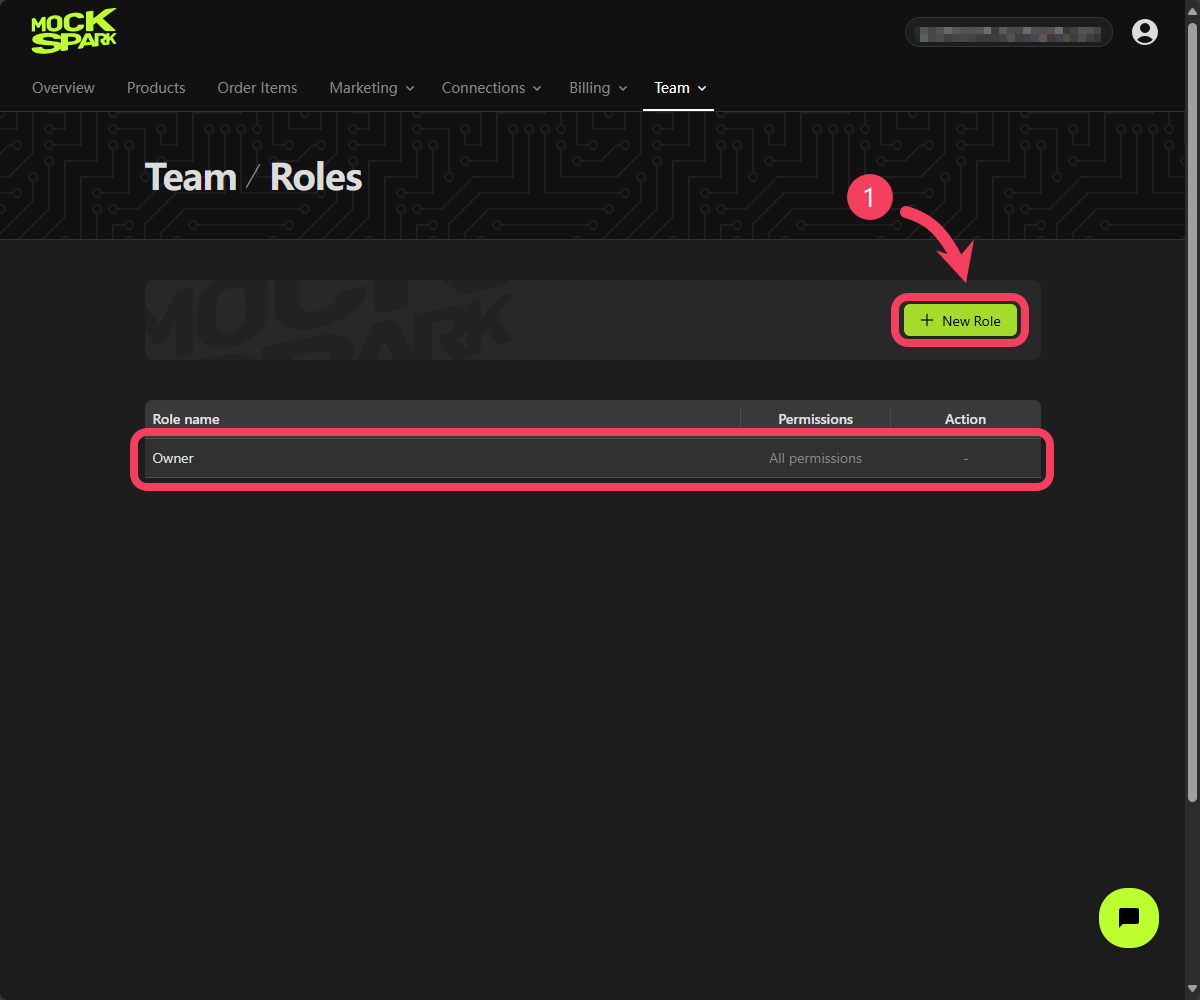
Owner for this account. This role has full permissions by default and cannot be edited or deleted.
Click New Role button to create a new role.
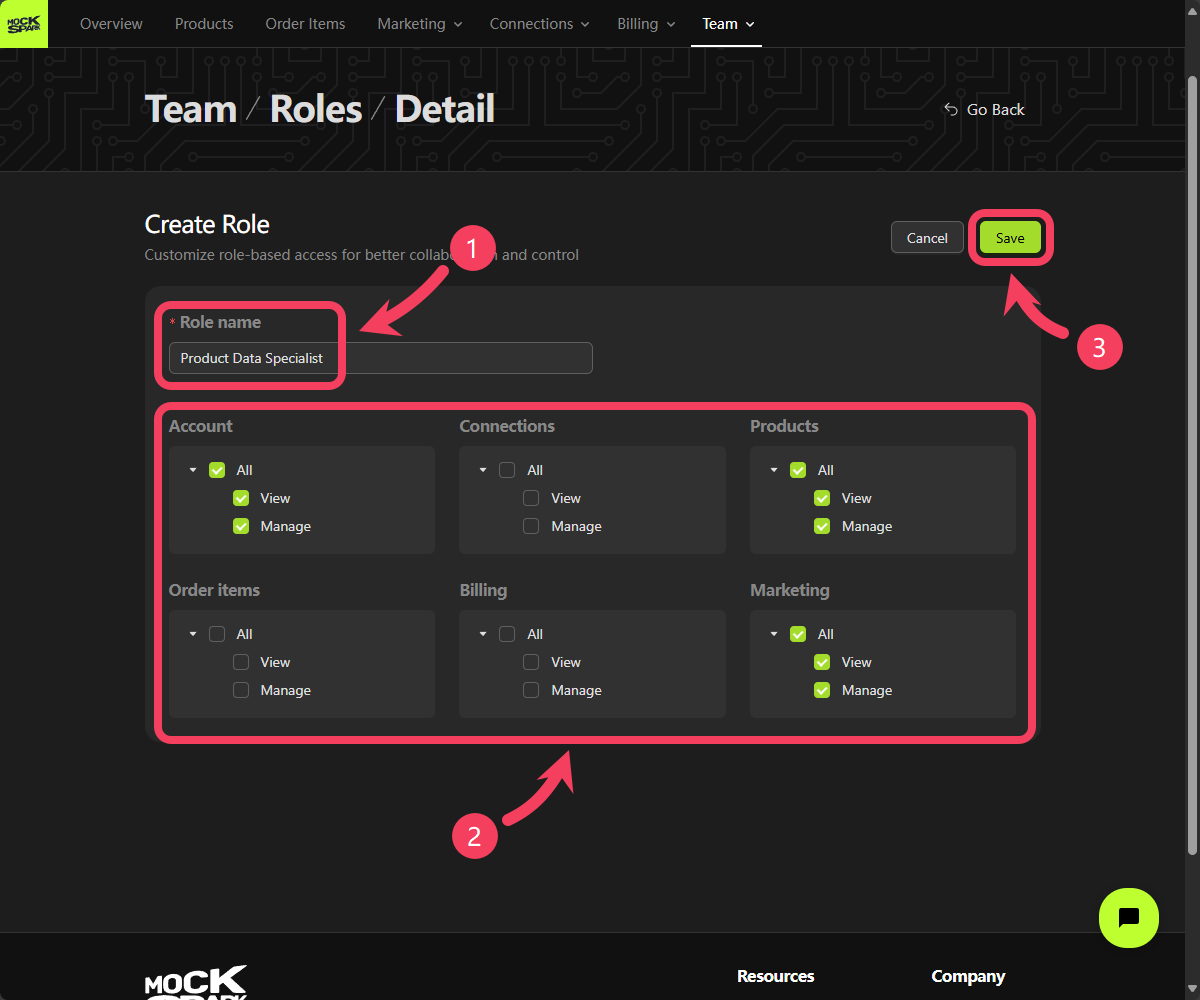
- Enter a name for the new role in the Role name field.
- Select the Permissions you want to assign by checking boxes within the six permission sets.
- The Account permission set includes the most essential permissions for any role. In most cases, this should be selected for all roles; without it, users may not be able to perform basic account-related actions.
- The Connections permission set determines whether a user can view and manage features within the
Connections Section. - The Products permission set controls whether a user can access and manage features within the
Products Section, such as creating new products and publishing them to your store. - The Order Items permission set determines whether a user can view and manage features within the
Order Items Section, such as reviewing and fulfilling order items. - The Billing permission set controls whether a user can access and manage features within the
Billing Section, such as viewing usage and purchase data, upgrading the subscription plan. - The Marketing permission set determines whether a user can view and manage features within the
Marketing Section, such as accessing and editing resource collections like pictures and other media.
- Click Save to create the role.
Invite a Team Members
Once you’ve confirmed that the new role has been successfully created, you can move on to adding a team member.- Select Team section from the top navigation bar.
- In the dropdown menu, click on Staff.
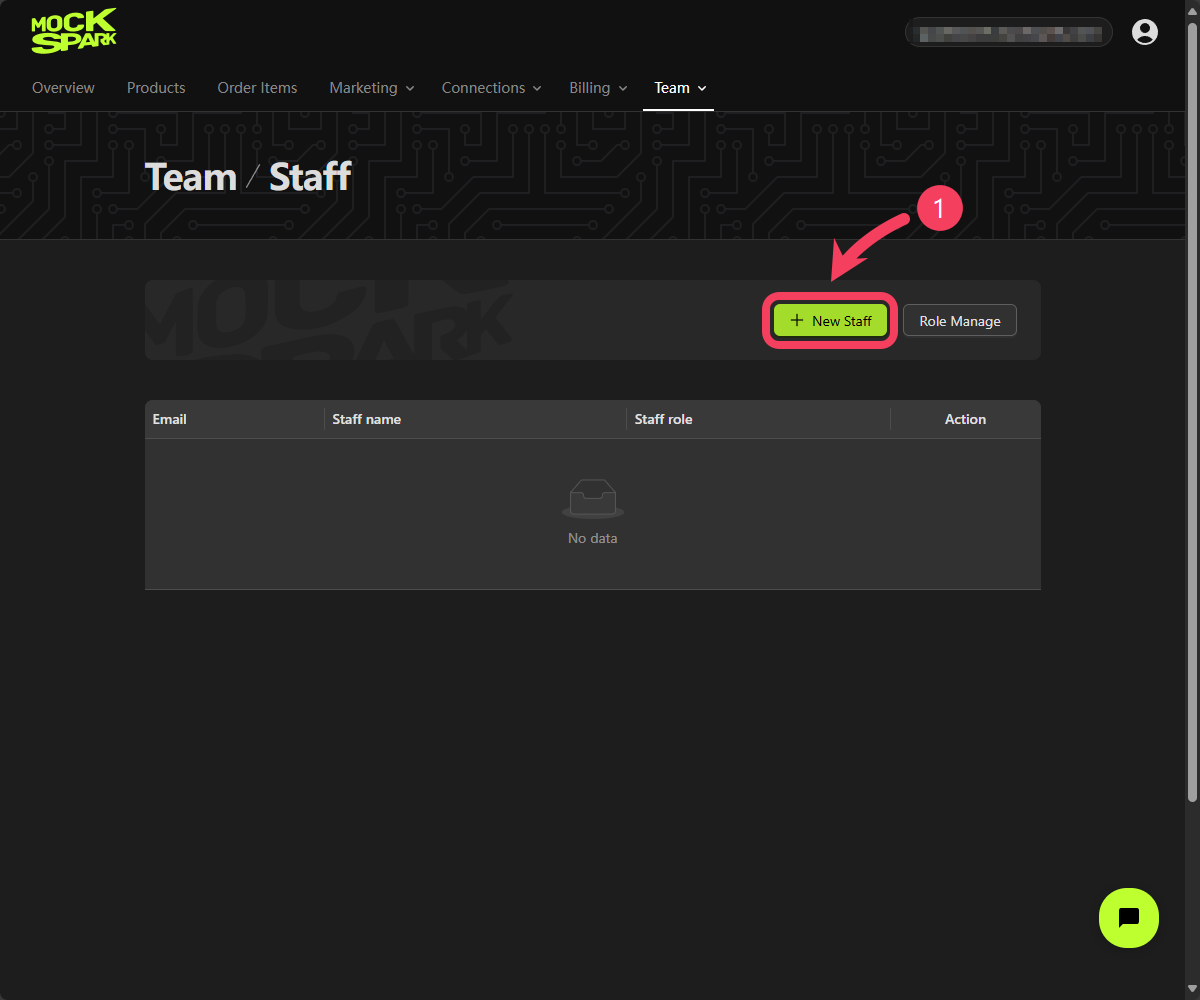
- In the dialog box, enter the new member’s
name,email address, and assignedrole. - Click Save to add the new team member.

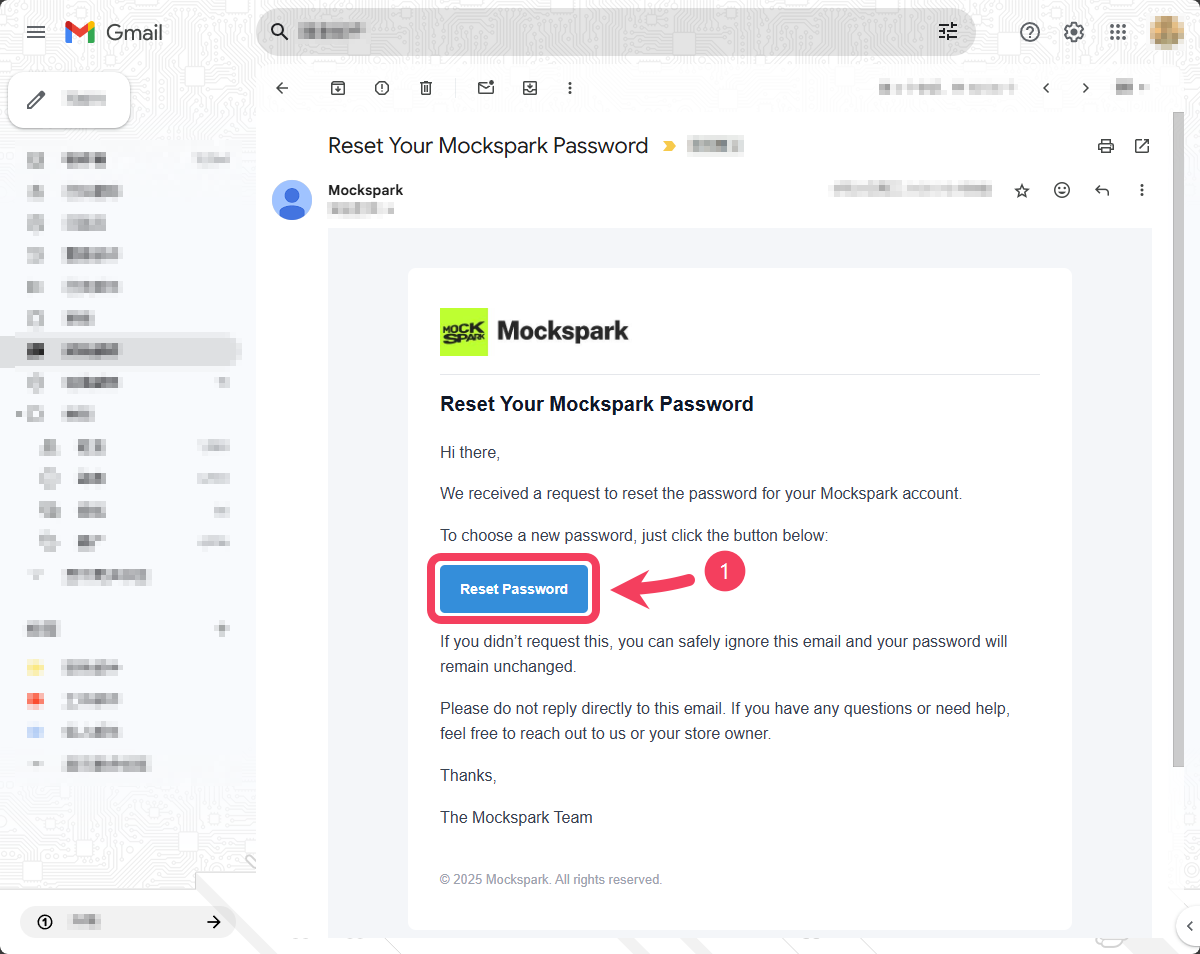
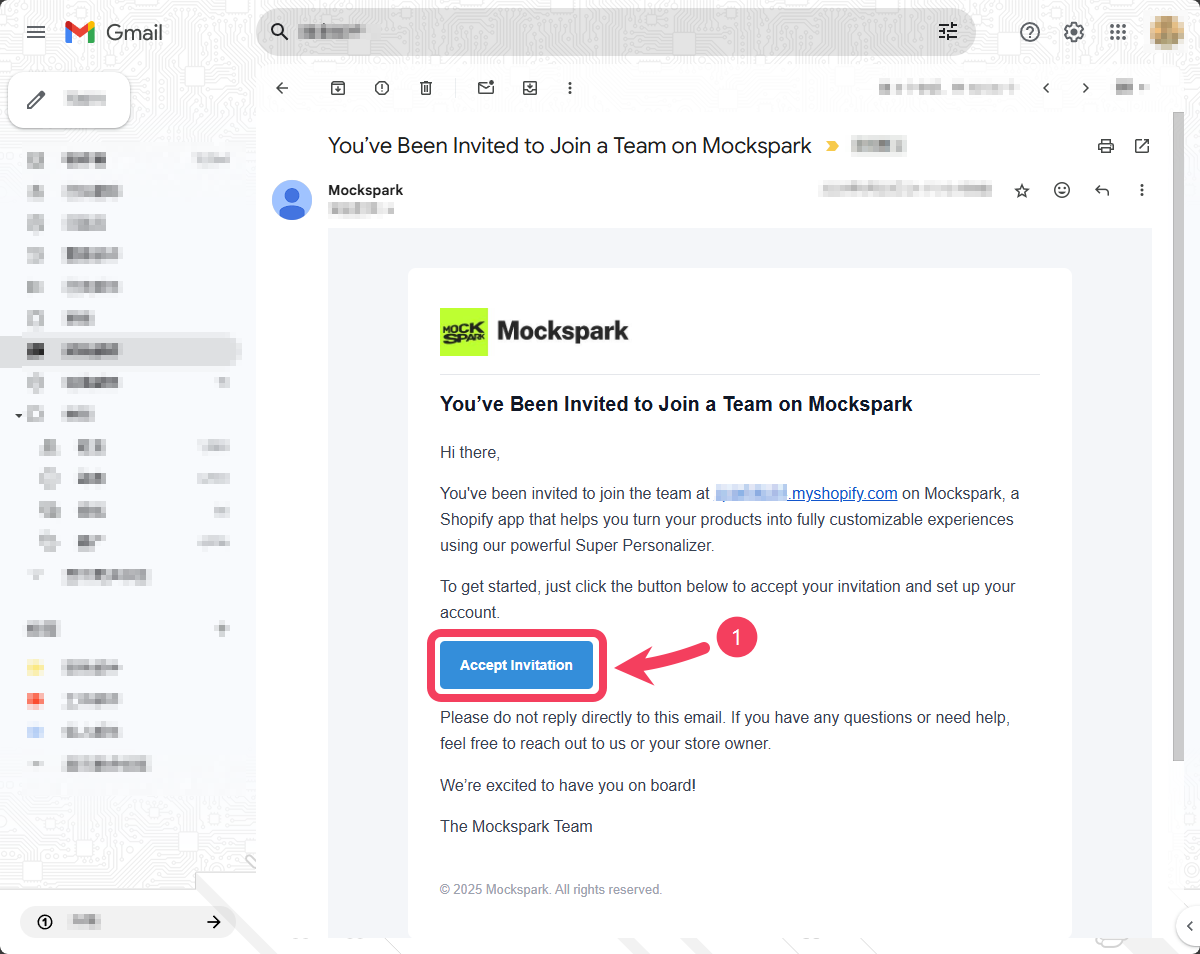
email to that staff.

email, they will be redirected to the MockSpark account activation page.
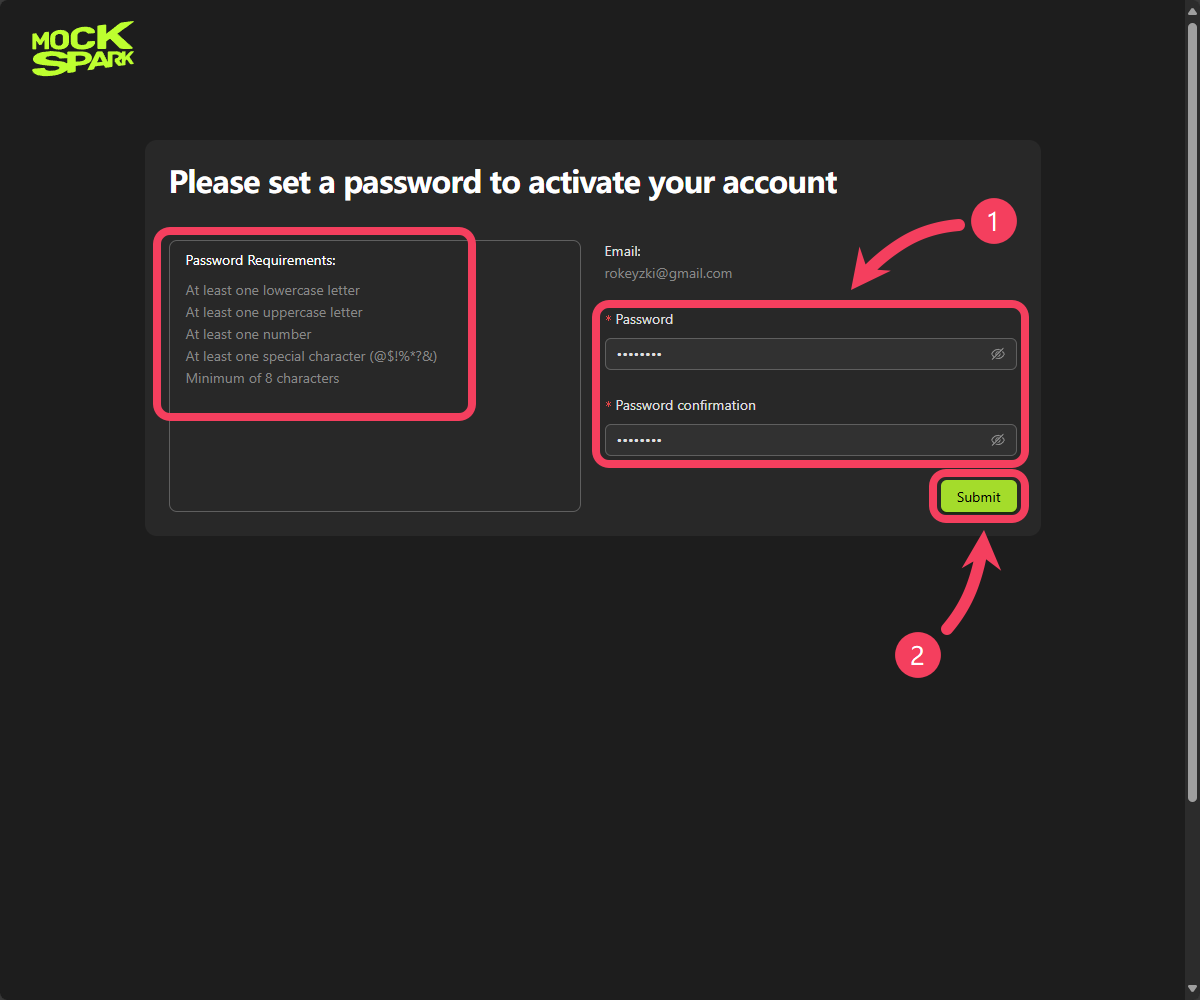
- On the account activation page, the invited team member can set their Account Password, which will be used for future logins. The password must meet the requirements shown on the left side of the screen.
- Click Submit to complete the account activation process.
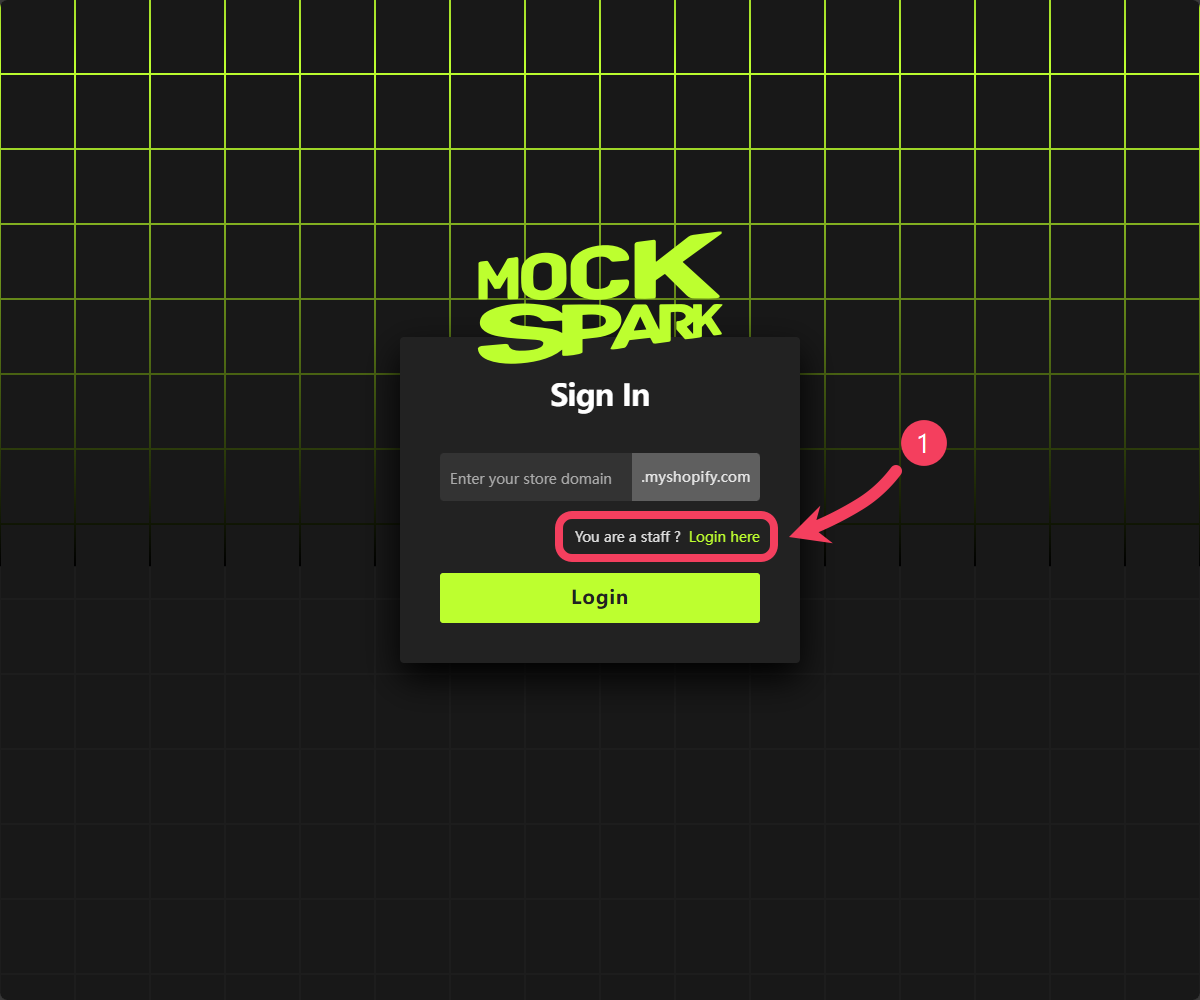
"You are a staff? Login here" and click it to switch to the Staff Login view.
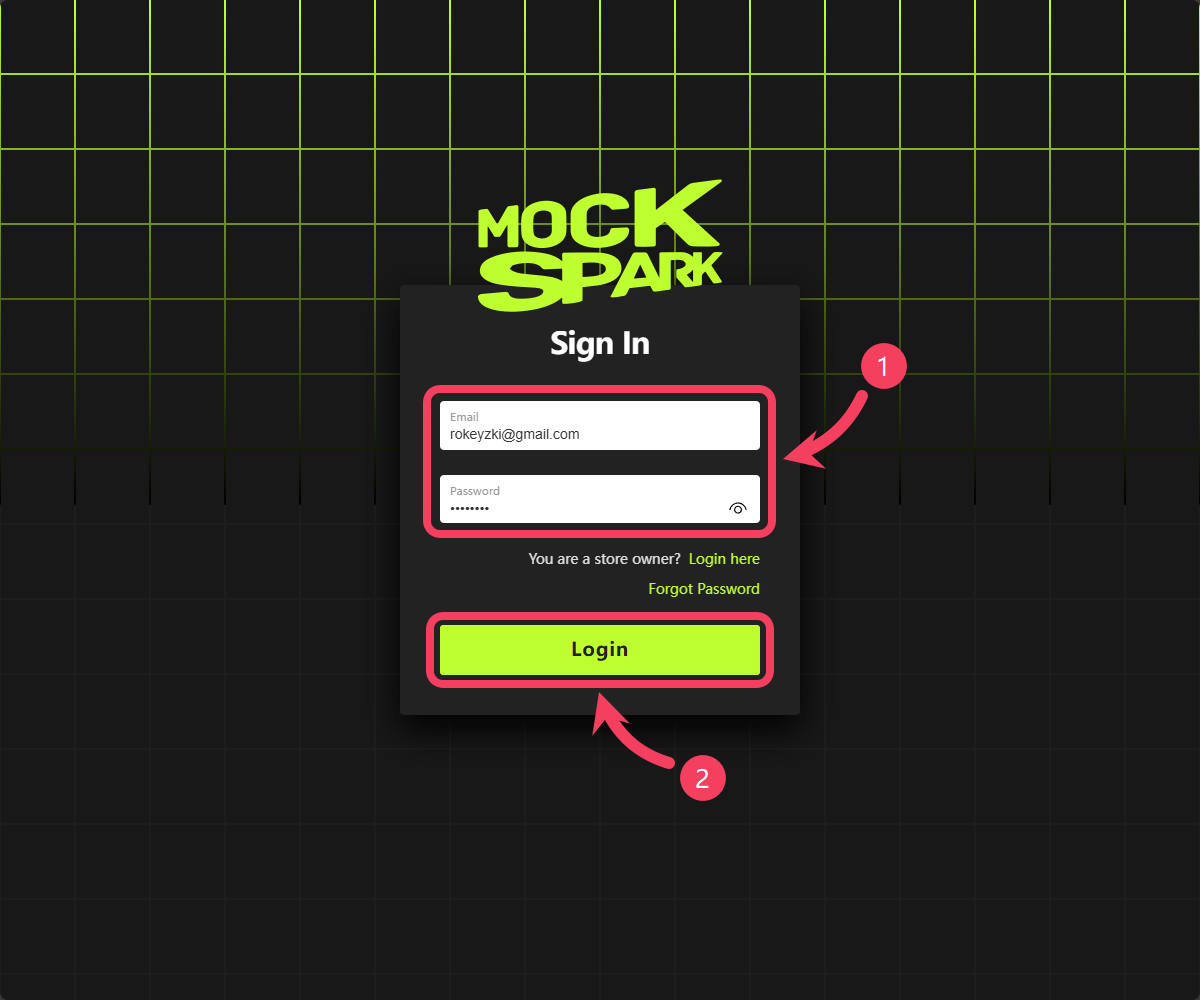
- On the Staff Login page, team members who have completed account activation need to enter their
email addressandpassword. - Click Login to access MockSpark.
How Can Staff Reset Their Password?
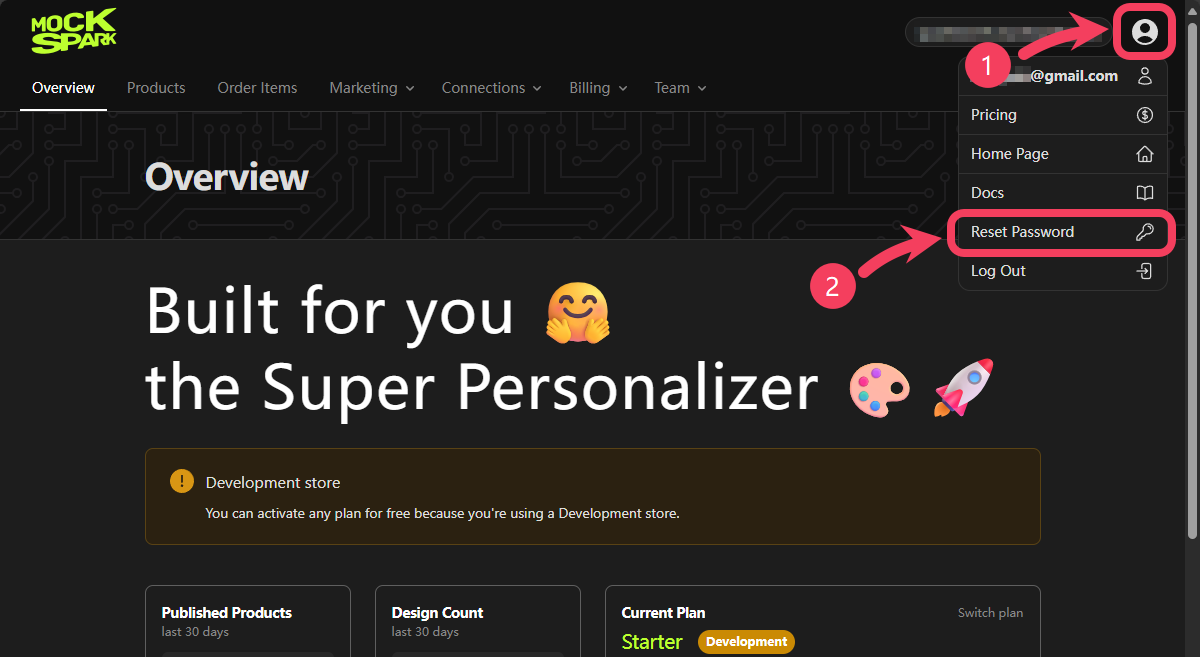
If a team member wants to change their password, they can follow these steps:- After logging in to MockSpark, click the profile icon in the top-right corner of the page.
- Select Reset Password from the dropdown menu.
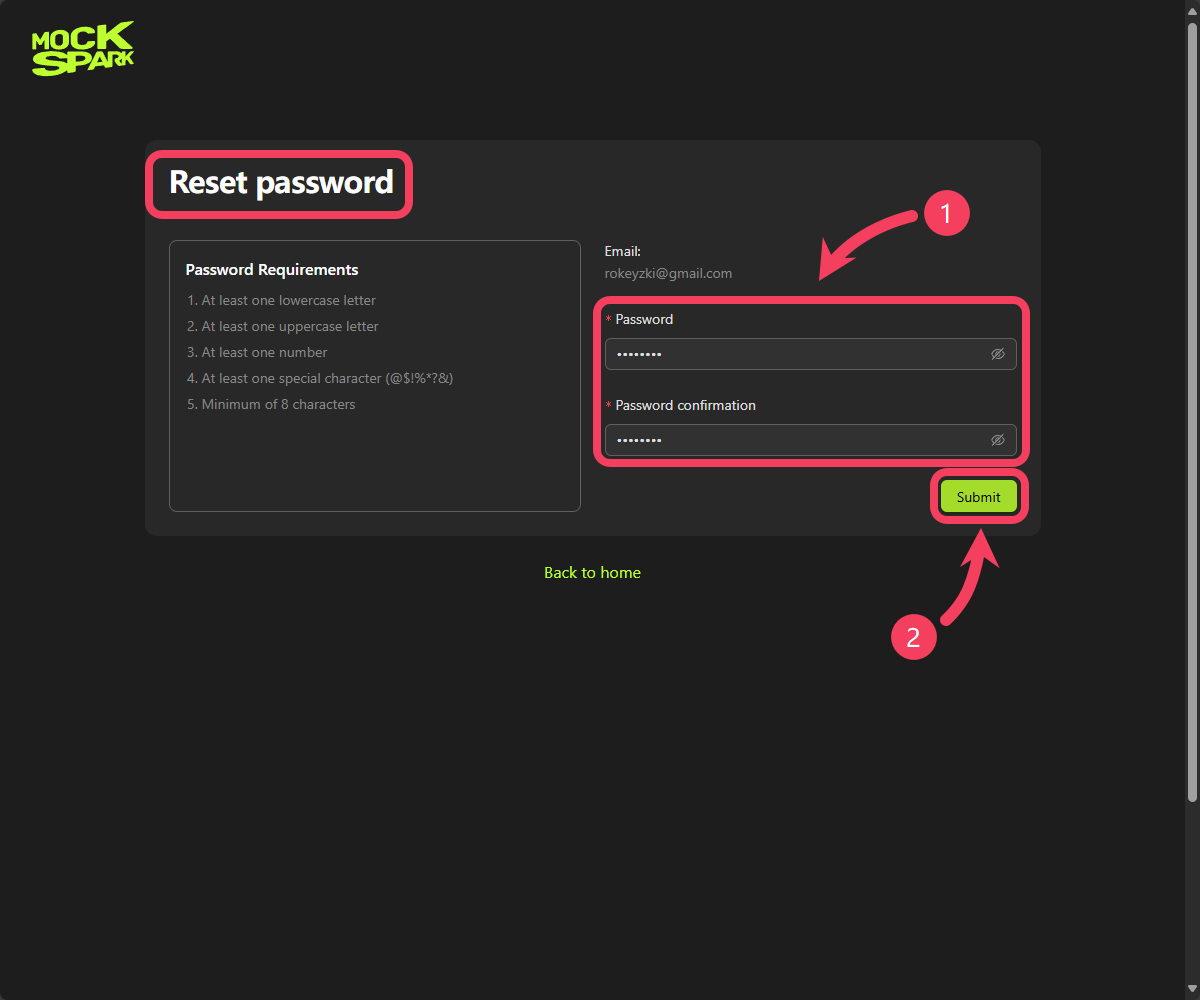
- On the reset password page, team members can set a new password for their account. The password must meet the requirements listed on the left side of the screen.
- Click Submit to confirm and update the password.
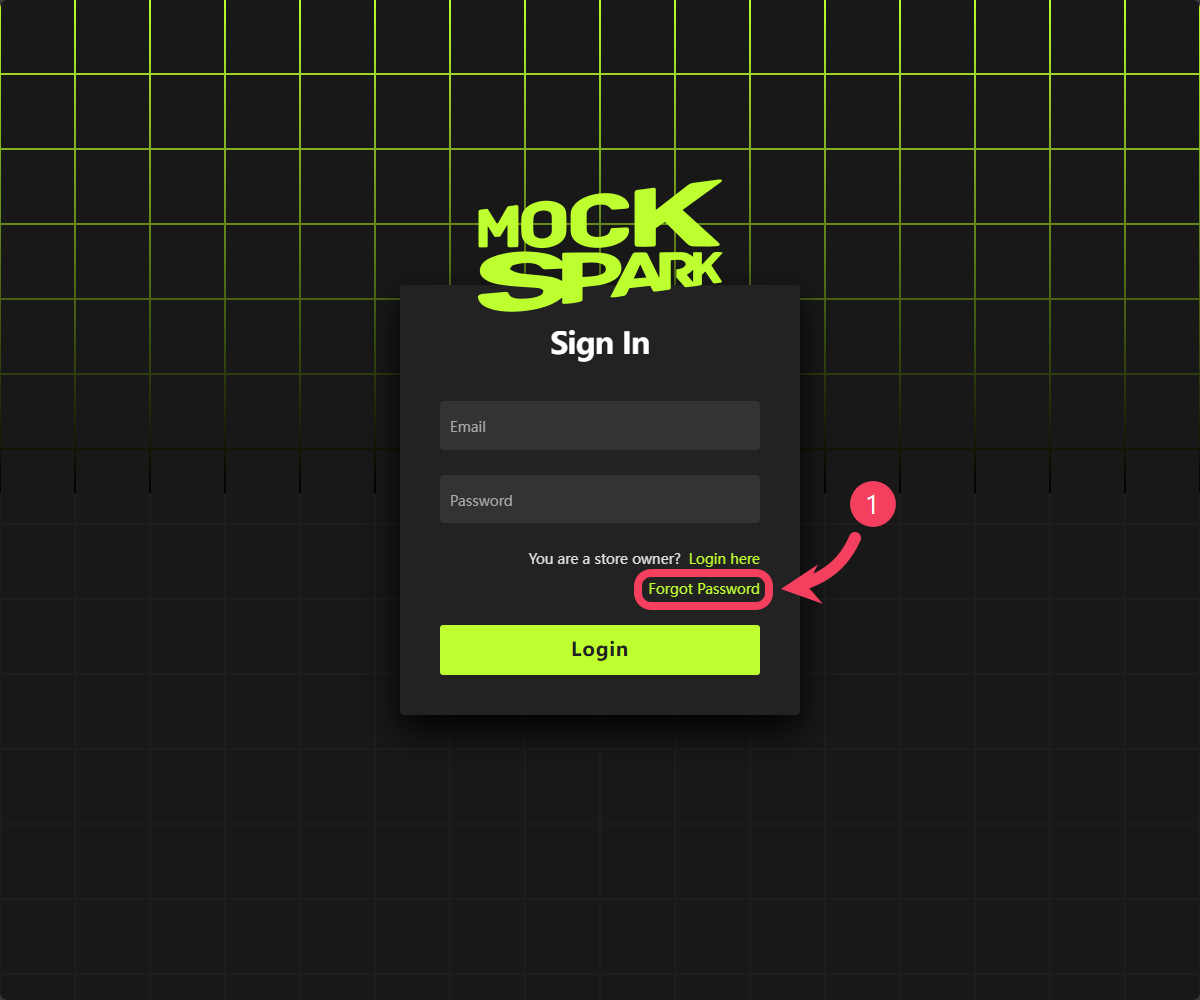
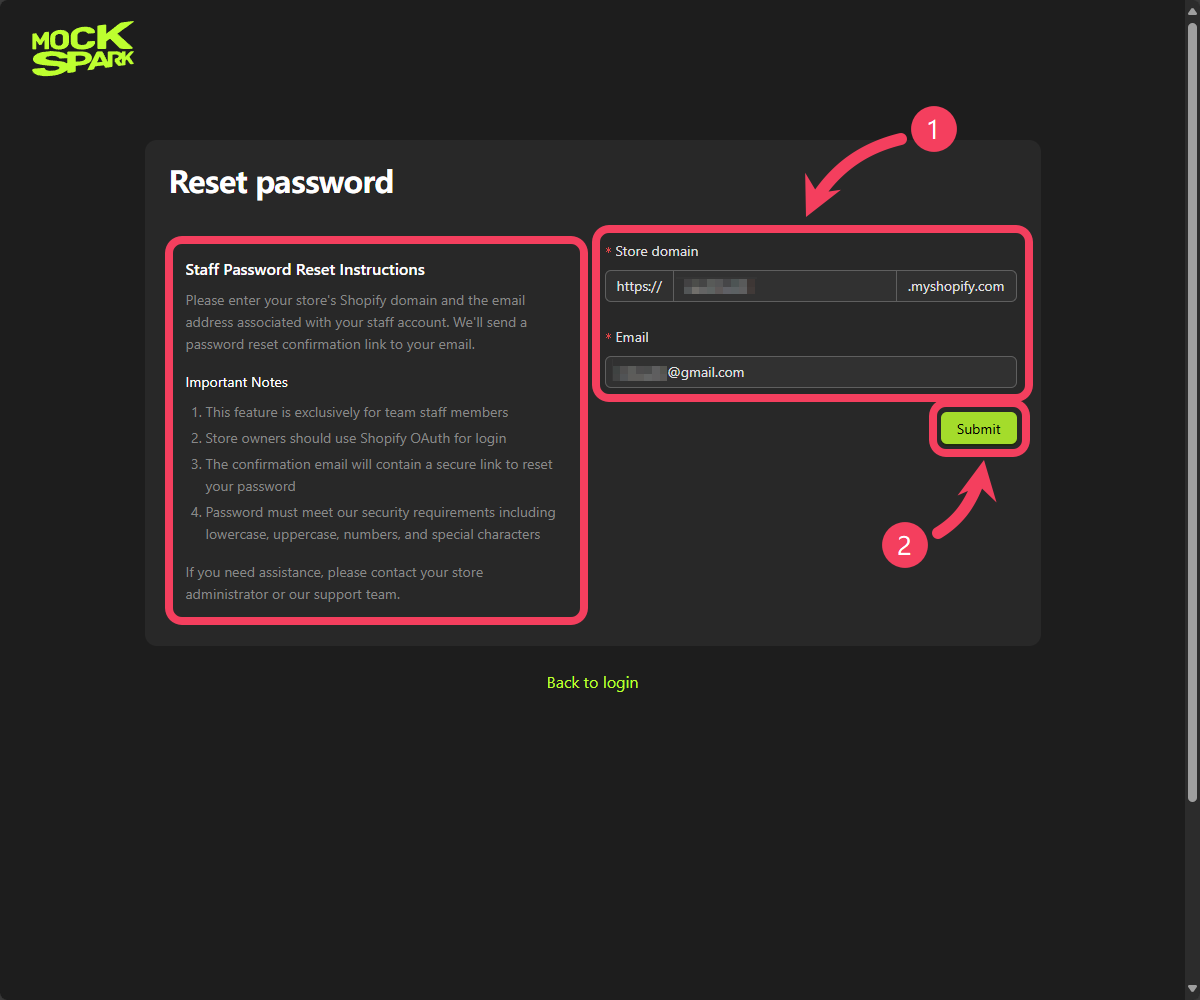
- On the reset password page, team members need to enter the
Shopify domainof their store along with theemail addressassociated with their account. A password reset confirmation link will be sent to thatemail. - Click Submit to send your request.