Install the Shopify App
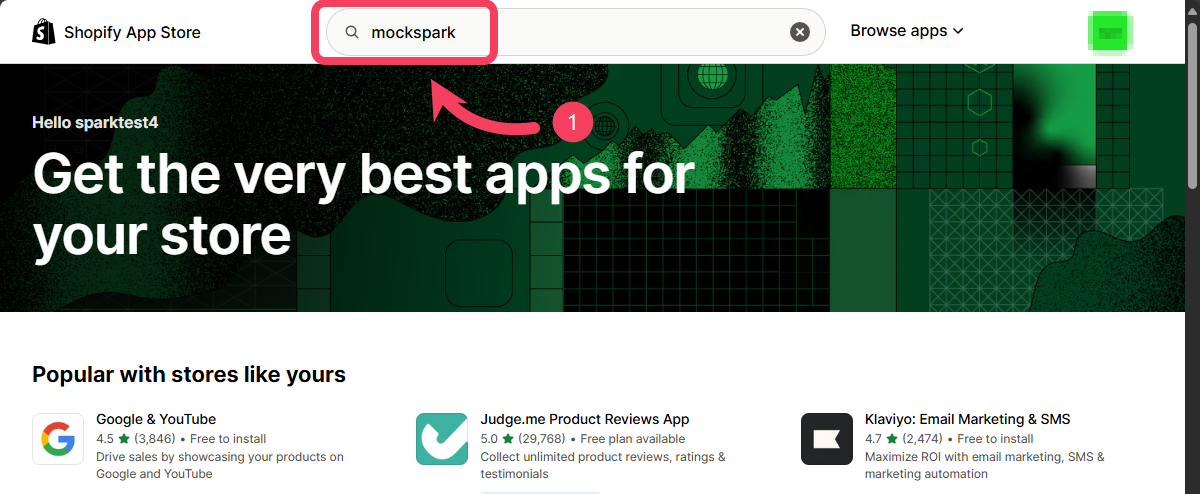
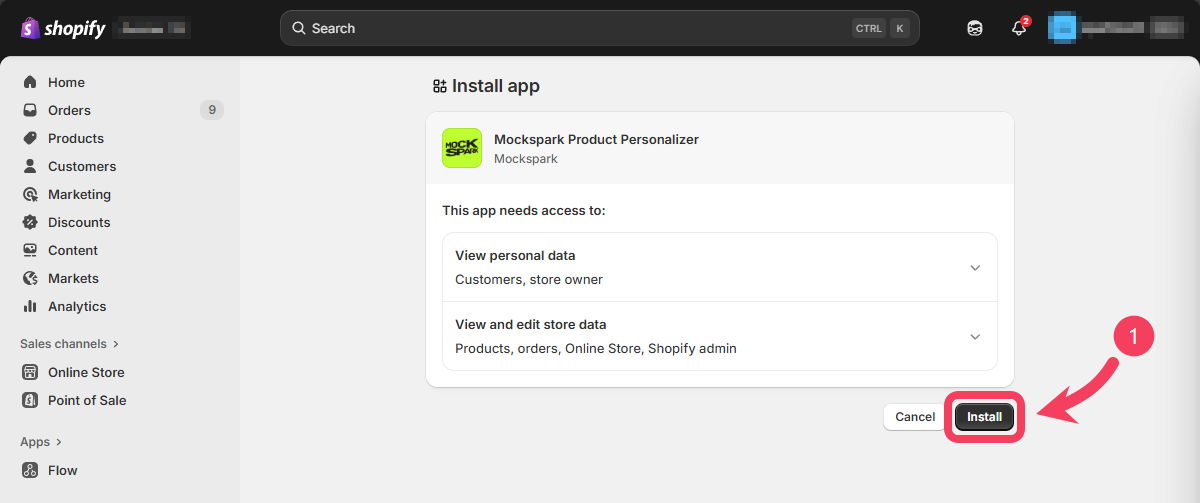
Go to the Shopify App Store and typemockspark into the search bar at the top. Find the app called Mockspark Product Personalizer, then click to open its details page and select Install.
Enable the App on Your Theme
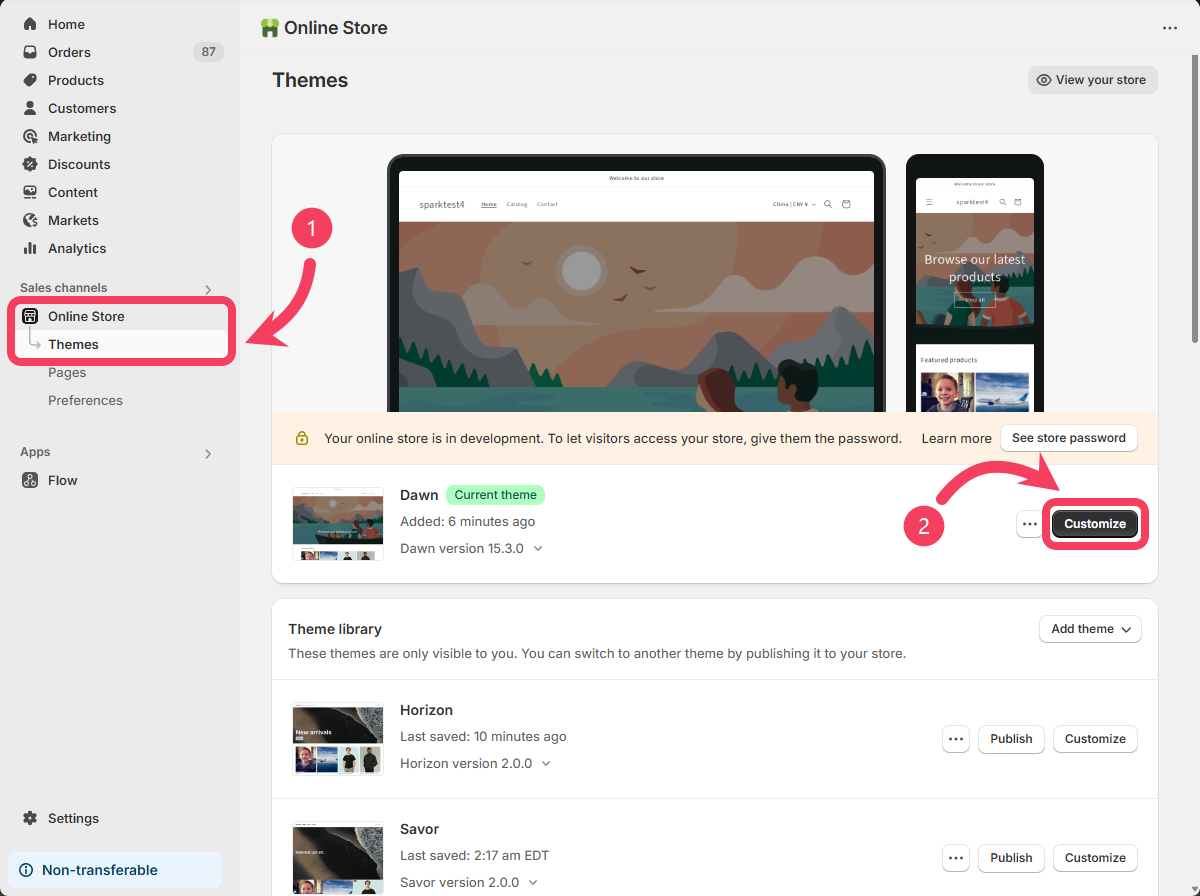
After you’ve installed the Mockspark Product Personalizer app from the Shopify App Store, just follow a few simple steps to enable the app in your current Online Store Theme. This will complete the setup and connect Mockspark with your Shopify store.- Log in to your Shopify admin and navigate to Sales channels on the left sidebar. Click on Online Store, and you’ll be taken to the
Themespage by default. - Find your current
Online Store themeand click the Customize button on the right side. This is where you’ll make a few setup changes to enable the app.
Enable the App Embed
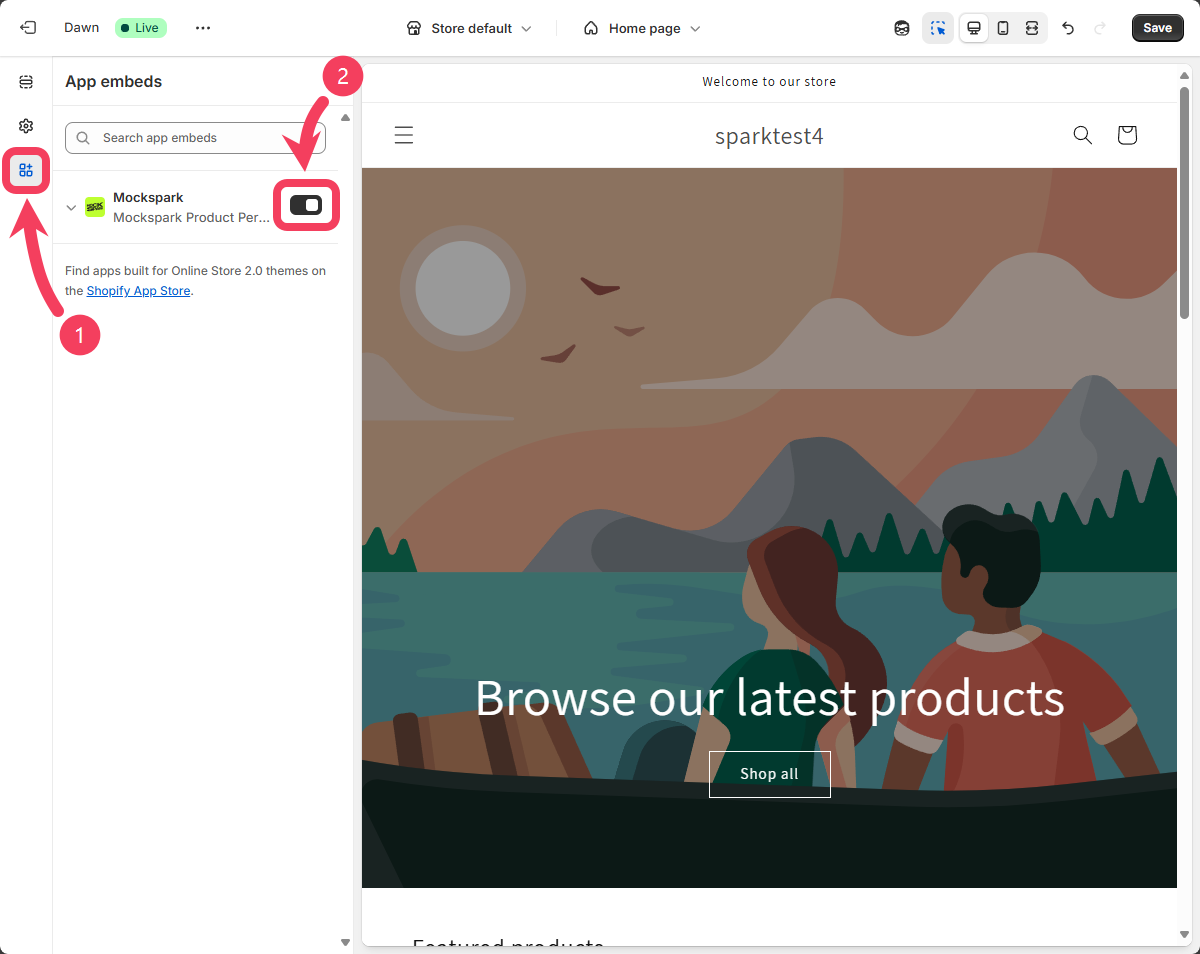
- On the
theme customizationpage, click the third icon in the left-hand sidebar to switch to the App Embeds panel. - In the
App Embedspanel, locate the toggle for Mockspark and turn it on to enable the app.
Add the Design Button
After enabling theMockspark App Embed, the next step is to add the Mockspark design button to your product detail pages.
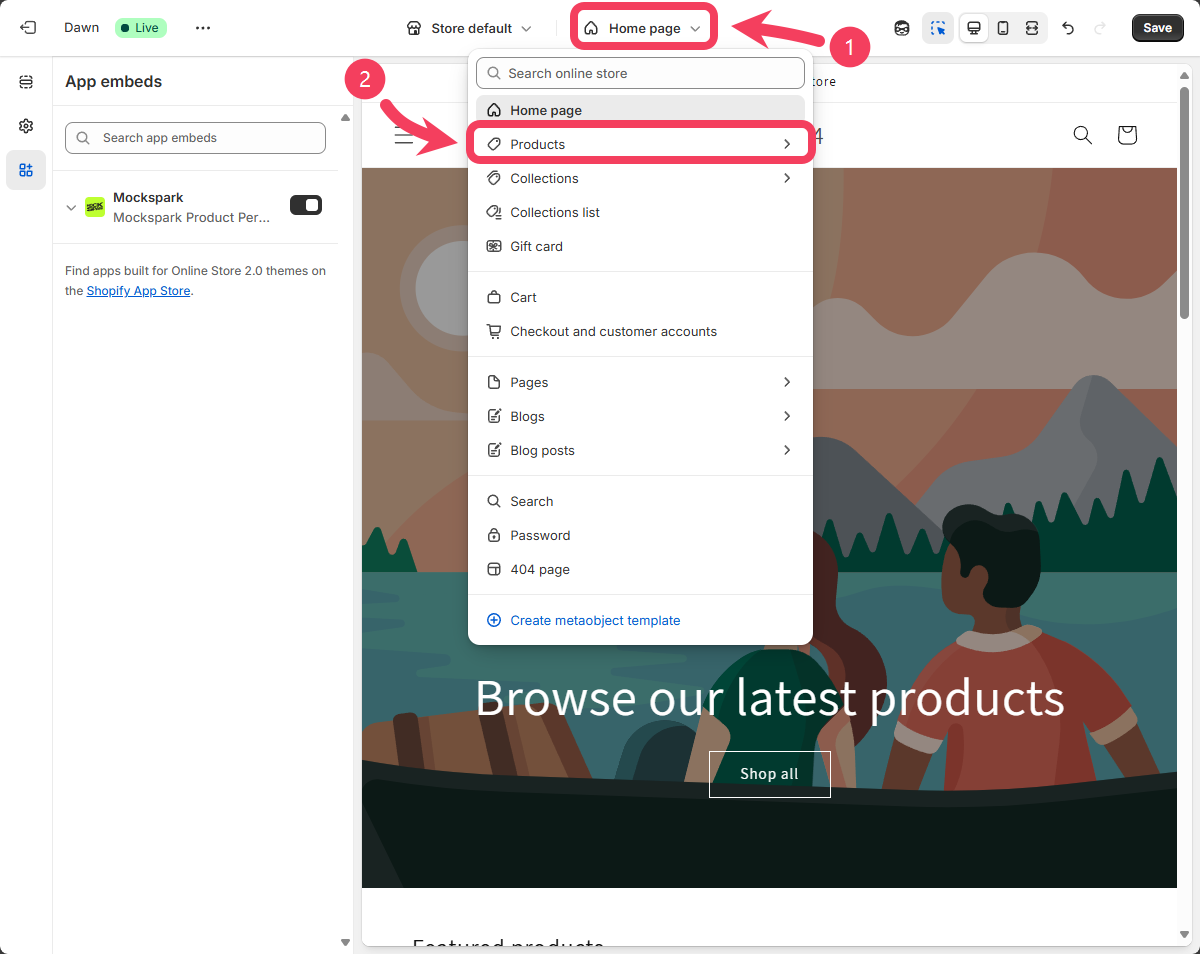
- At the top of the
theme customizationpage, click the dropdown that says Home page. - From the dropdown menu, select Products.
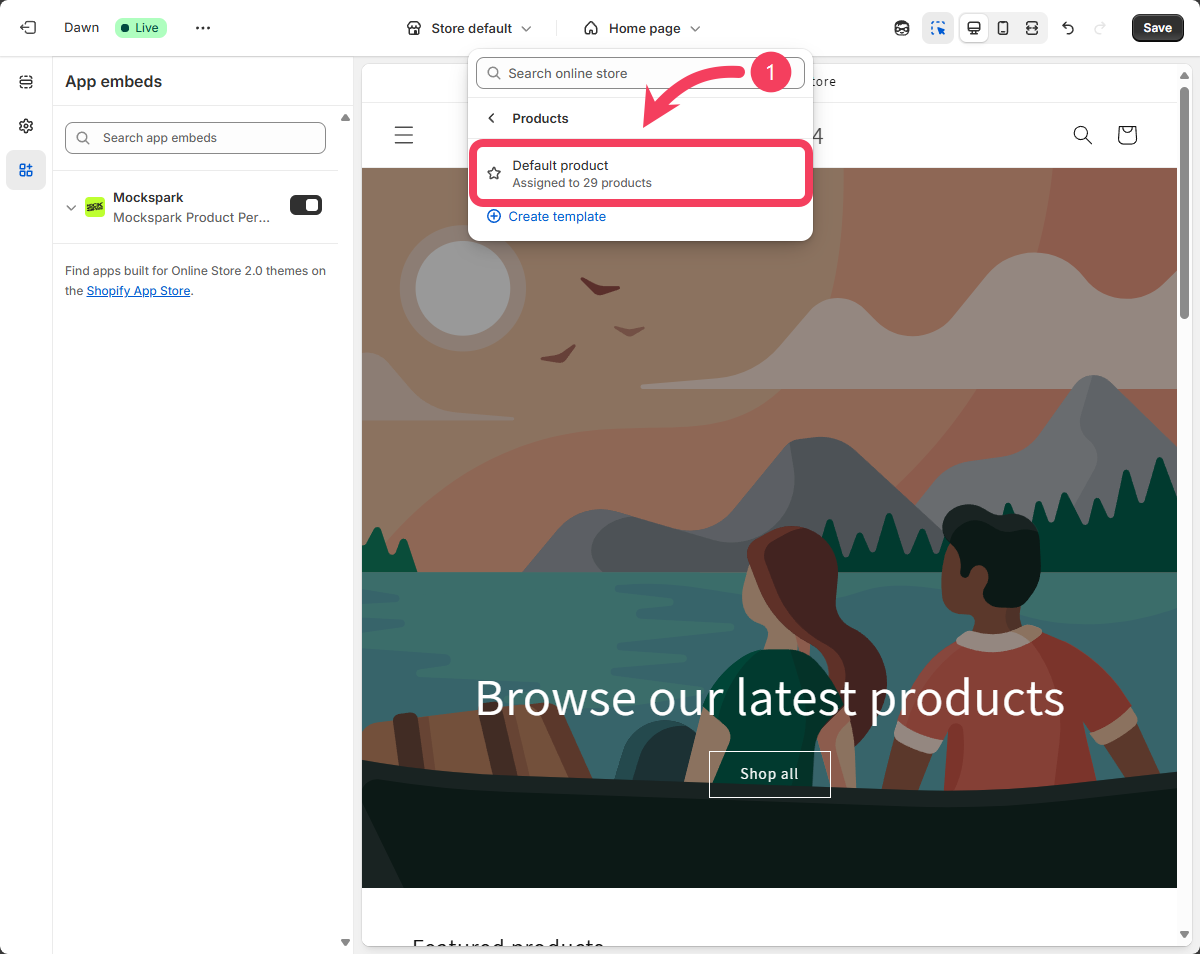
product detail page template, choose a spot where you’d like the Mockspark design button to appear. A common placement is just above the Add to Cart button.
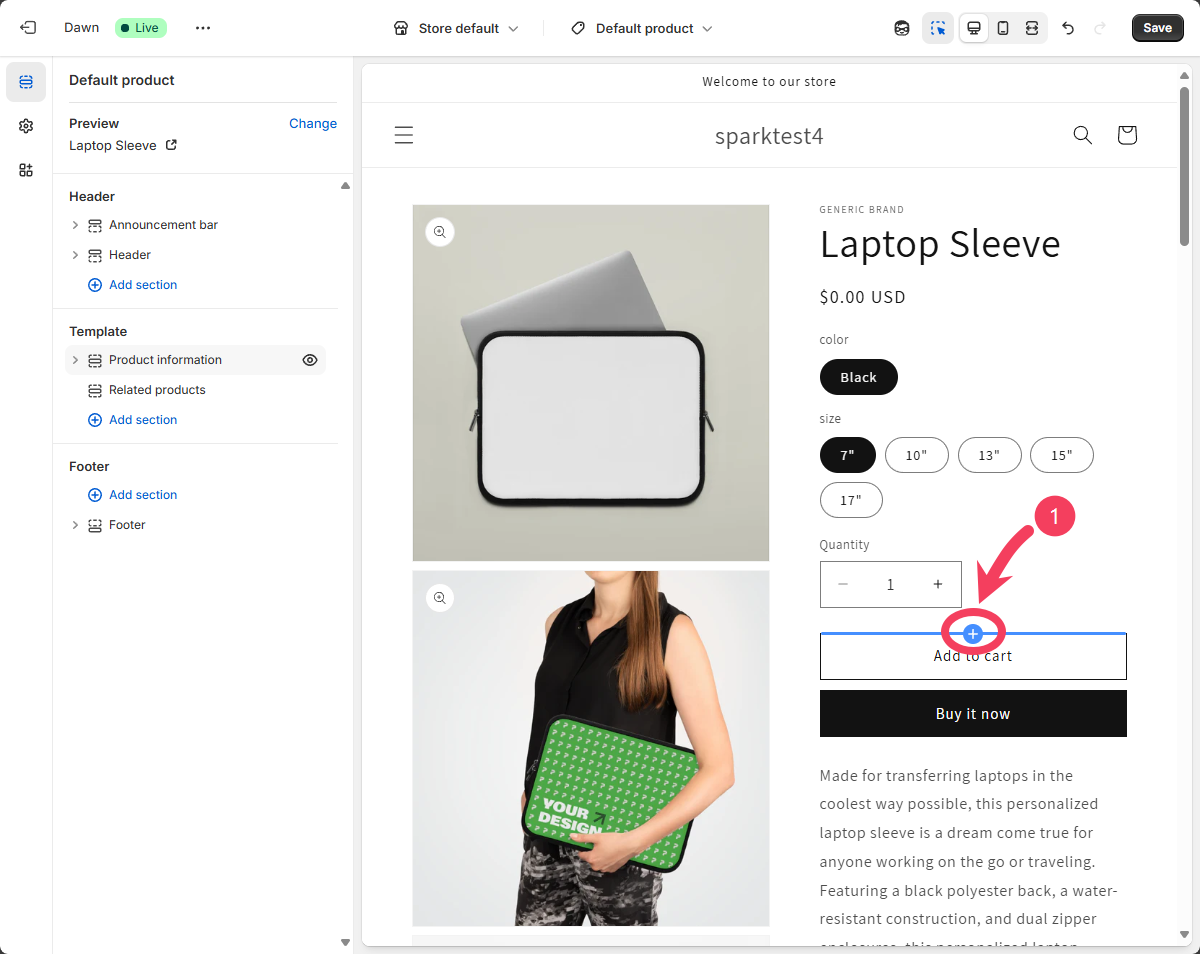
Move your cursor to the area where you want to add the button. A blue interactive highlight will appear on the screen. Click the plus() icon to insert the element.
In addition to visually adding the 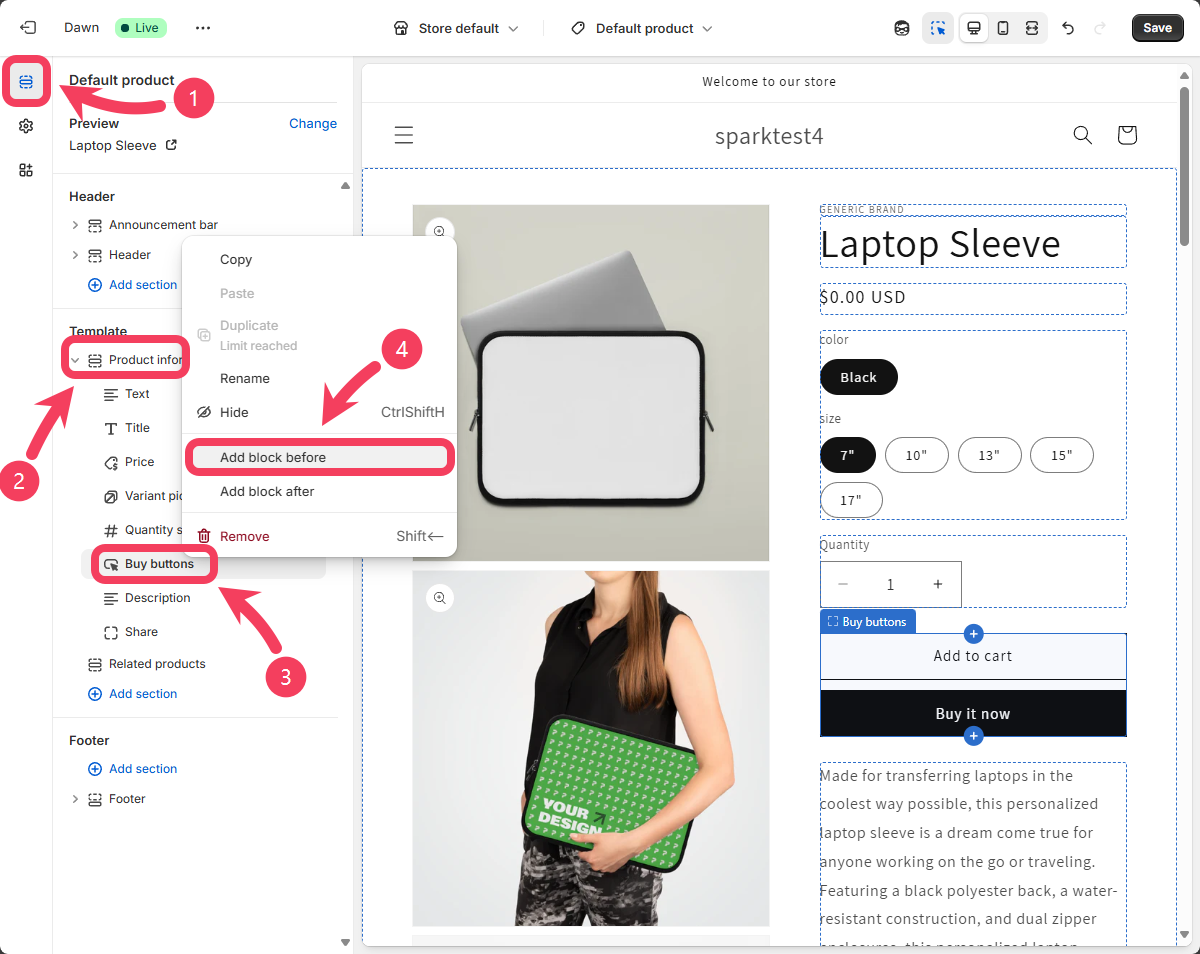
Mockspark design button within the product detail page template, you can also add it through the Sections panel.- Click the first icon in the left-hand sidebar to switch to the Sections panel.
- Under the Template module, select Product information.
- In the expanded list, find Buy buttons, then right-click on it.
- From the context menu, select Add block before to insert the button above the Buy buttons section.
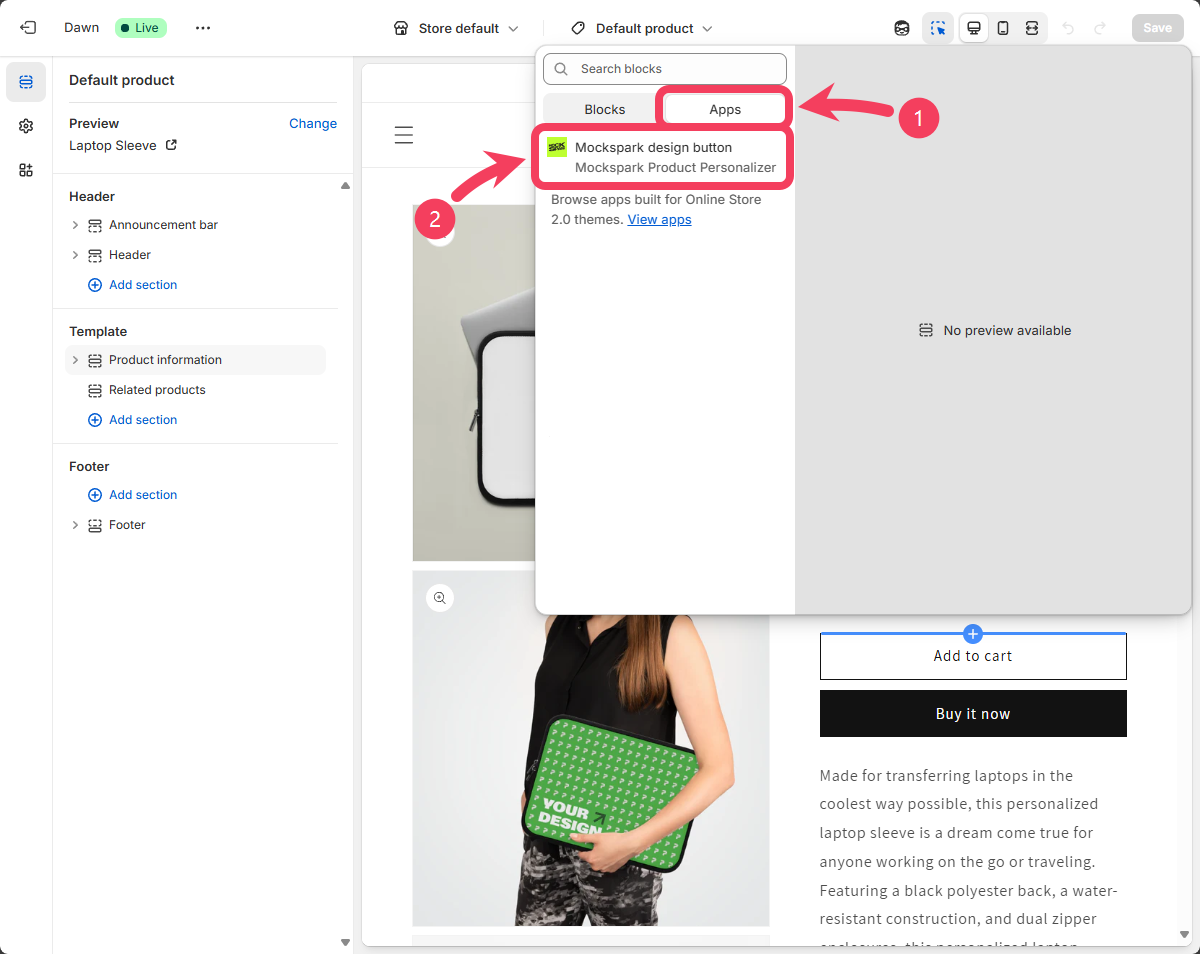
- Once you’ve selected the insertion point, a dialog box will appear on the screen. In the dialog box, switch to the Apps tab.
- After switching to the
Appstab, scroll down and select the Mockspark design button.
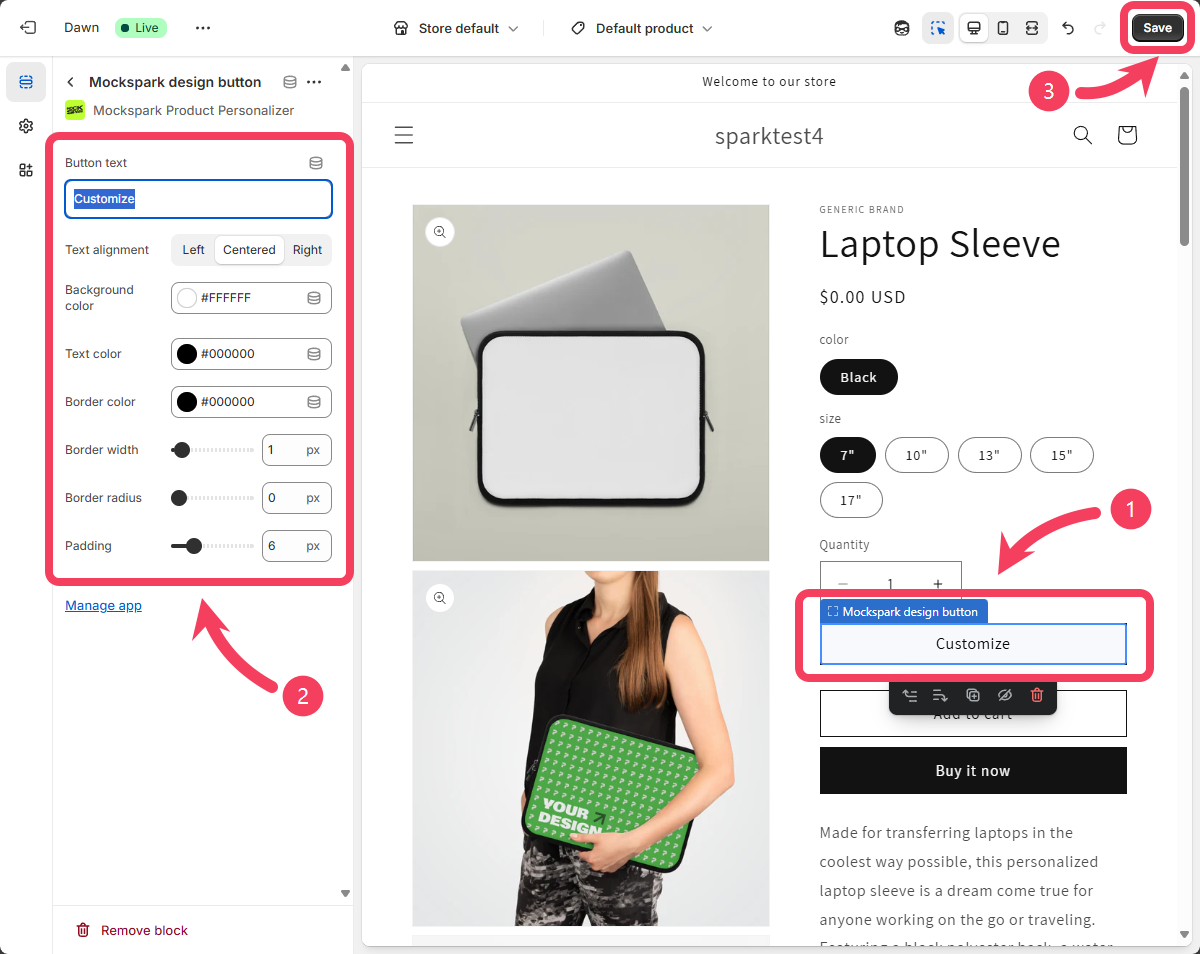
- Now, in the product detail page template, you’ll see the Mockspark design button we just added. Select the button, which is labeled
Customizeby default. - After selecting the Mockspark design button, the settings panel will appear on the screen. From here, you can customize the button’s style to better match your store’s theme and overall look. You can also change the text that appears on the button.
- After you finish configuring the button, make sure to click the Save button in the top right corner of the page. Otherwise, your changes will not be saved.
Next steps
If everything went smoothly, you’ve successfully installed and enabled Mockspark. Now it’s time to create and publish your first customizable product. Let’s get started:Quick Start Guide
Start selling your customizable products in minutes